
Your shopping cart is currently empty.
Free EmbroideryClick Here
FREE shipping on orders over $249*
Imagine a world where every personalized shirt you make is great the first time around. The world isn't ideal, but that's the reality we have to face. Unfortunately, blunders are an inevitable part of life and can have serious financial consequences. There's no need to let a slip-up ruin your day while you're working on creating the perfect wholesale t-shirts to sell, designing t-shirts for a local team, or working on a particular gift for a friend or loved one.
To be in the business of decorating clothes, your primary activities will revolve around those that enable you to attach objects to shirts. Screen printers and garment makers use ink, vinyl, and other materials to create unique and eye-catching designs for t-shirts. This is an original work of art by them. Screen Printing Vs. Embroidery is customization depending on individual preferences.
However, as was previously stated, just like with any other kind of art, mistakes can and do occur while decorating clothing. It's not uncommon for designs to blur into one another, ink to smear or not fully cure, and vinyl to go wrong somewhere. Vinyl has the advantage of being removable, which is something that ink can’t do. One can reuse the tee if they remove the vinyl first.
Anyhow, there is no restriction regarding how to remove vinyl lettering from shirt if you have made a mistake. At times, you can also be bothered by vinyl cracking on your shirt and badly want to get rid of it. There is no need to worry about how to remove letters from a shirt. For such situations, these methods can be a life savior.
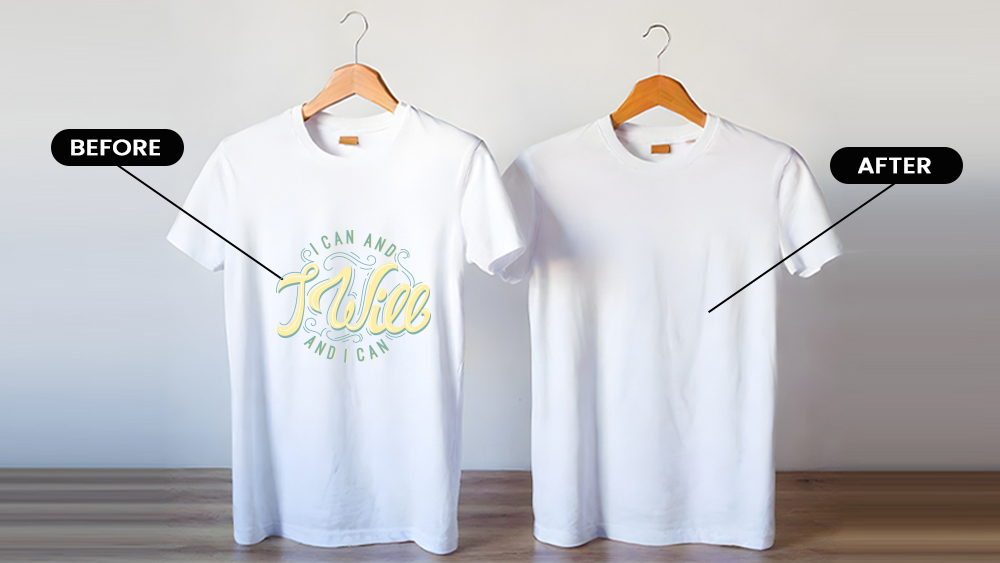
In this article, we will guide you about how to remove vinyl from a shirt and make it look as flawless as possible.
DIY home improvement projects are easy to make using heat transfer vinyl, a common crafting material. HTV, or heat transfer vinyl, is a specialized adhesive that can be easily applied to various materials, such as totes, tees, and more.
Cut vinyl for use in heat transfers is a creation of designers using special machinery. The HTV is then transferred using a heat press. With HTV, you can easily opt for screen printing any design on a shirt without spending as much time or money. For this particular reason, many people choose HTV.
Do you want to know how to remove HTV from fabric or how to get HTV off shirt? Well, the options are endless. It's a relief to know that most iron-on transfers can be successfully removed using the same methods.
There are generally two main reasons why you might wish to take the heat transfer vinyl off of your shirt.
1- You messed up the project and need to save it so you can start over. Correcting an error is preferable to starting from scratch.
2- Second, the vinyl logo on the shirt is starting to peel. Your goal is to free your shirt from the vinyl so you may give it a makeover. Don't feel like you need to go out and buy all new shirts when you can easily update your wardrobe by giving your existing ones a makeover.
The aforementioned aren't the only factors contributing to your desire to get rid of your heat transfer vinyl.
You have the desire to participate in recycling. Removing heat transfer vinyl from a shirt is a fun DIY project for the crafty recycler. No need to toss out those old tees.
It's a breeze, plenty of fun, and not too difficult. Vinyl is simple to apply and remove. This is a great project for beginners, and it may even spark an interest in making crafts your full-time occupation.
Tweezers and an X-acto knife are useful tools for removing vinyl, but there are more options. It could take longer to complete some procedures than others. You can reduce your risk of harm by using certain procedures that only employ natural materials.
Choosing the right fabric is crucial, especially for an athletic person. Now the question is what type of clothing to opt for athletic wear wholesale? Fabrics having 10% cotton content should be safe for most vinyl removal techniques. However, if your cloth is polyester, you shouldn't use any heat-based procedures for HTV removal. If you want to go with custom options then you can purchase outfits of renowned brands such as Gildan, Port Authority, Next-Level, Sport-Tek, and others from our website.
To effortlessly remove the vinyl from a T-shirt, peel it off or scrape it off after applying the Heat Transfer Vinyl remover for fabrics, which works by dissolving the adhesive backing. Due to the potent chemical components, vinyl removers emit foul odors while working. When working with vinyl remover, it is important to do it in a well-ventilated area while wearing protective gear such as gloves.
Purchasing commercial vinyl remover is a must if you enjoy designing your own t-shirts. Applying and undoing any mistakes by peeling off the vinyl is simple.
The best results from vinyl removers can be attained by carefully reading the product's packaging. These are the typical steps used in vinyl cleaners:
First, the T-shirt needs to be flipped inside out. Find the vinyl's reverse side, which is usually firmer to the touch and can sometimes be seen through the fabric.
Second, cover the reverse side of the vinyl with a generous amount of vinyl remover.
Third, maintain constant hand pressure on the vinyl decal's edges and pull gently. By doing so, the decal will become easier to remove.
You can use tweezers to remove the decal once you notice that its edges are peeling away from the fabric.
Take off the decal in large chunks as you work. 5.
Sixth, wash the shirt in hot water to remove the solvent and any vinyl residue that may have been left behind.
Using a hot iron is the quickest and easiest way to remove HTV from cotton garments, but it may also be the most challenging. How to remove vinyl from a shirt with an iron is outlined below.
First, make sure your iron is set to its highest temperature. Referring to a temperature reference can help you avoid a shirt fire.
Second, you must hold the iron firmly and steadily. The shirt must be pulled tightly over the iron. The decal needs to be applied with the correct side up. The shirt can also be ironed while laid flat on an ironing board.
Third, you can begin peeling the vinyl off once you notice that it has begun to separate from the fabric and appears wrinkled. The edges are the best place to start peeling.
You can wash the shirt in the washing machine to eliminate the residue. Drying it on a high heat setting in the dryer after washing is the next step. The adhesive traces may be erased in this way. You can always try steaming it if that doesn't do the trick.
You can remove vinyl with rubbing alcohol, a mild solvent that is safer than the others. Compared to vinyl remover, alcohol is more affordable.
However, a vinyl remover can be more effective than alcohol. To successfully remove vinyl with alcohol, follow these simple steps:
Hold the decal's reverse side over a sink or basin and flip the garment inside out.
You can either use a damp towel soaked in alcohol to wipe the decal's vinyl backing, or you can carefully pour alcohol over the entire back of the decal.
Loosen the fabric around the decal by tugging and pulling with your hands.
The decal may be difficult to remove from the fabric, so please be patient. If the decal needs to be re-soaked in alcohol, you can do so.
Put the clothing through a cold water rinse.
Vinyl adhesive residue can be cleaned up with petroleum jelly.
Does Goo Gone stain clothes? Well, toxic compounds in Goo Gone make it an efficient tool for removing HTV from fabrics. Goo Gone requires cautious treatment to avoid contaminating other surfaces.
Goo Gone can be found at many stores, and its price is relatively low. One should use Goo Gone in a well-ventilated area. Gloves and safety glasses are also recommended. The procedure for using Goo Gone is:
Place a huge plastic garbage bag or a tablecloth over your desk.
Spray the decal's back with Goo Gone and flip the shirt inside out.
After applying the Goo Gone, wait 30 seconds for it to work.
The vinyl transfers can be removed using tweezers once the decal has separated from the cloth.
If the vinyl sticker is firmly attached to the material, remove it with Goo Gone.
Before washing the garment in the washer, rinse it in the sink to remove any remaining chemical and vinyl residue.
The thought of using a flat iron to remove the vinyl from a shirt may give you pause. There's no denying the usefulness of flat iron around the home. The use of a hair dryer is recommended instead. For optimal results, use a hairdryer of cotton rather than polyester. You can get started by following these steps:
Step one is to stuff cardboard or a towel inside the shirt to prevent leakage through the back of the garment. Prepare an ironing board by laying the shirt flat.
Have your hairdryer at its hottest setting.
Put the correct side of the decal up in the third position. Keep the hair dryer close to the shirt but away from the vinyl. Gently rub the decal with the hair dryer by moving it back and forth over it.
The decal will start to come off after only 30 seconds. Tweezers can also help to get rid of them.
Do it again until all the vinyl of the shirt or other clothing.
Have some old nail polish remover lying around? Regardless of your tee type and style, give it a shot at removing that stubborn vinyl from your tee. You can use nail polish remover to remove printing from different types of t-shirts.
As you know, this brand is known for its athletic clothing. Your fav Sports-Tek PST74 gets stained, and you can't wear more. So, no more worries now with this method, the mark of nails can remove easily & you wear this pant as you want.
For example, Bella canvas 3001cvc t-shirts are very durable and soft, but nail polish remover can help remove it if the printing starts cracking or peeling. Apply the remover to a cotton ball and gently dab the problem area. The remover should dissolve the vinyl printing without damaging the actual shirt material.
The same technique can work for Russell Athletic 7S4DBX t-shirts and other brands.
You can remove cracked logos from Port Authority F217 with this method. The rough fabric or cracked design doesn't look good.
Consequently, the Port Authority S508 offers casual, formal & sports clothing. The brand offers high-quality clothing to their consumer that stays long last. Moreover, using this method, you can remove nail paint marks from the Port Authority J325 Men’s Core Soft Shell Vest Polyester. The key is to go slow and avoid soaking the shirt; apply it to the problem areas.
For performance athletic shirts, start by spot-testing nail polish remover on an inconspicuous area to ensure it doesn't damage the fabric or graphics. If all looks well, you can proceed to the entire problem area.
Nail polish remover is a gentle chemical that dissolves the vinyl and plastic materials used in t-shirt printing but not the natural cotton fibers of the shirt itself. Regular cotton tends to be more resistant than ring-spun cotton, so test first if you're unsure.
Gather your supplies. You'll need a nail polish remover that contains acetone, cotton balls or pads, a spoon or dull knife, and a plate or tray. Avoid using anything with a conditioner, like a cuticle cream remover.
Pour a little nail polish remover onto the plate or tray. Also, don't soak the entire cotton ball in the bottle. You only need a small amount.
Place the t-shirt on a flat surface and position the vinyl lettering face up. Holding the dull knife or spoon under one corner or edge of the vinyl, apply the acetone-soaked cotton ball to the area and let it sit for 30 seconds.
Gently lift from underneath with the knife or spoon to check if the vinyl is loosened. If not, reapply the acetone and continue checking every 30 seconds until it starts to lift.
Once loosened, slowly and carefully peel off the vinyl with your fingers while wiping away any remaining adhesive with the acetone-soaked cotton ball.
Repeat the same process for any remaining vinyl areas. Rinse the area with water to remove any excess acetone residue and let air dry.
With some patience and the right technique, you'll get that pesky vinyl off your tee and be able to rock it again in no time. Let the DIY t-shirt restoration begin!
Using your washing machine's hot cycle is an easy way to remove vinyl from a t-shirt. The heat and agitation will help loosen the vinyl's adhesive so you can peel it off.
Turn the T-shirt inside out. This will prevent the vinyl letters from sticking to the inside of your washer.
Pretreat any remaining adhesive residue around the vinyl letters. Apply a grease-fighting dish soap or a solvent like Goo Gone to the area and let it sit for at least 30 minutes.
Wash the t-shirt on the hottest setting possible using a heavy-duty detergent. The hot water will help soften the adhesive and loosen the vinyl from the fabric.
Add a booster like OxiClean to help lift any adhesive residue from the t-shirt.
Avoid fabric softener, which can coat the fibers and prevent proper adhesion removal.
Move the t-shirt to the dryer and dry it in the hottest setting. The heat and tumbling action will continue to loosen the vinyl letters.
Check on the t-shirt every 10-15 minutes. Gently peel back a corner of one of the vinyl letters to see if it's ready to come off. If it lifts easily, it's ready. If not, continue drying in 10-15 minute increments until it's loose enough.
Once the vinyl lifts easily, remove all letters and any remaining adhesive residue from the t-shirt using your fingers or a blunt tool like a putty knife.
Examine the area where the vinyl was attached. If any adhesive remains, pretreat it again and repeat the wash and dry cycle until all residue has been removed.
For stubborn vinyl that does not come off easily with heat, you may need to try a solvent like Goo Gone applied directly to the area before washing again.
With patience and persistence, using your washer and dryer can effectively remove vinyl from a t-shirt without damaging the fabric. Repeating the process and checking progress every few cycles will ensure you return your t-shirt to a blank slate.
Washing and drying custom shirts can be tricky, especially when using special fabrics and inks. Here are some tips for customers with customized clothing to wash their items in a washing machine or dryer:
For custom cotton shirts like custom cotton polo shirts, we recommend washing in cold water on a gentle or delicate cycle.
Best friend shirts - Turn the shirt inside before washing to protect any printed graphics or words. This will prevent them from rubbing against the agitator or sides of the washing machine. Warm or cold water needs to be used on the gentle cycle. Hot water can cause fading and shrinkage, especially with cotton shirts.
Raglan T-shirts - Avoid using the highest heat setting. Custom raglan shirts have more seams and details that can become damaged or deformed at high heat. Stick to the medium or lower temperature settings. You may need to experiment to find the ideal setting that fully dries the shirts without damaging them.
Ringer T-shirts - Handwashing and drying customized ringer shirts require some care and attention. The first step is to check the care label on the shirt to see if it can be machine washed. Many custom ringer shirts have cotton and can be machine washed gently or delicately. Further washing machine dryer method is the same.
Hand washing in cold water with a gentle detergent is best for wholesale blank t-shirts made of polyester, nylon, or spandex blends. These materials are more delicate and prone to shrinking. Avoid the dryer and air dry these custom athletic t shirts instead. The heat from a dryer can damage heat-sensitive prints and dyes used on custom wholesale shirts.
For drying all kinds of tees, tumble dry on low heat for no more than 10-15 minutes to avoid shrinking the cotton fabric. For longer-lasting custom shirts, consider air drying.
Besides that, you can also pick an appropriate method for these types of shirts:
A sharp craft knife is the simplest way to remove vinyl from a t-shirt. This method requires patience and a steady hand, but you can successfully remove the vinyl without damaging the shirt with some care and caution.
For this method, you will need:
A new craft knife with a pointed blade
A cutting mat or board
Tweezers (optional for removing small pieces)
Place the t-shirt on your cutting mat and carefully slide the knife blade under one edge of the vinyl. Apply firm and even pressure as you slowly cut through the vinyl. Take your time and be cautious, especially around curves and corners.
As you cut, use the tweezers to grasp and peel away pieces of the vinyl from the shirt. Remove as much as possible after each cut to keep the area you're working on clear. Continue cutting and peeling in small sections until the vinyl has been removed from the shirt.
Any remaining adhesive on the shirt can be gently scraped off using your craft knife and tweezers. Gently scrape in small circular motions, careful not to snag or cut the shirt material. So, you may need a solvent like Goo Gone or acetone applied with a cotton ball or cloth for stubborn adhesive. Remove any leftover substance, gently washing the area with water.
Carefully inspect the area where the vinyl was attached to ensure all pieces and adhesive have been removed. Use your fingertips to feel for any bumps or rough spots. Re-cut or re-treat as needed.
However, With patience and a steady hand, you can successfully remove the vinyl from a t-shirt using a sharp craft knife without damaging the material. Take it slowly, be cautious around curves and seams, and do multiple inspections to ensure a clean removal. Your t-shirt will be vinyl-free in no time!
For this method, you'll need a few simple tools:
Tweezers: Small, pointed tweezers work best for grasping onto vinyl letters and decals.
Heat Gun or Blow Dryer: Heat will help loosen the vinyl's adhesive bond from the shirt.
Goo Gone or Rubbing Alcohol: Using a solvent will help break down any remaining adhesive residue after removing the vinyl.
Turn on your heat gun or blow dryer and wave it over the area of vinyl you want to remove. Move it back and forth, holding it a few inches from the shirt. So, the heat will cause the vinyl to soften and loosen its grip. Take extreme caution not to scorch the fabric.
Once the vinyl has heated up, look for an edge or corner you can grasp onto with your tweezers. Gently lift while continuing to apply heat. Slowly and carefully peel the vinyl away from the shirt using small movements. If it's not coming off easily, reheat it and try another section. With some patience, you can remove the entire decal or lettering.
There will most likely be some stubborn adhesive left behind on the shirt after removing the vinyl. Apply a small amount of Goo Gone, rubbing alcohol, or a similar solvent to the area and let it soak in for several minutes. Then use a soft cloth to blot and wipe away the residue. You should repeat this a few times to clear away any remaining stickiness.
After removing the vinyl and adhesive, machine wash the shirt separately the first time. Then it can be washed as usual with your other clothes. The heat and agitation will help eliminate any remaining residue, and your shirt will be vinyl-free again!
With heat, elbow grease, and the right solvents, you can successfully remove vinyl from a t-shirt using this tweezer method. Further, be patient and take your time peeling for the best results. Your freshly "de-vinylized" shirt will look as good as new!
Now that vinyl is removed from your tee, style it the way you want. When it comes to t-shirts, there are many things you can do to style them in different ways. Whether you want to stretch out a tight shirt, age an old tee, or iron on a graphic, there are simple techniques you can use.
How to stretch a t-shirt? First, to stretch a shirt that is too tight, soak it in water and fabric softener. Let the shirt sit in the solution for 30 minutes, then remove it and lay it flat to dry. The fibers will expand, and the shirt will stretch out slightly.
Next, In styling the different types of t-shirts, crewneck tees, and long sleeve t-shirts are two of the most common styles.
What is a crew neck t-shirt? Crew necks are the classic round-neck tee.
What is a raglan sleeve t-shirt? Raglan sleeves attach from the shoulder seam down the arm, giving more range of motion.
How to distress a shirt? Use sandpaper to wear down high-friction areas like the collar, hem, and shoulder seams to distress a tee. You can also use scissors to cut small holes and fray the edges for a vintage look.
You should know how to iron a picture on a shirt to style this tee perfectly. Use a T-shirt with at least 50% cotton and an iron-on transfer sheet for iron-on graphics. Place the transfer face on the shirt and iron it according to the directions. To expose the design, remove the transfer sheet.
Generally, look for shirts made with ringspun cotton t-shirts, which are stronger, softer, and more durable. Gildan, Next Level, and Comfort Colors are some of the best brands for quality t-shirts you can buy in bulk for customizing or reselling. Moreover, always check the fabric content, fit, and size chart to find tees that meet your needs. check out our blog to get Tips for Buying Comfort Colors Apparel and make your purchases worthwhile.
If you want to know further how to remove print from a shirt, read our other blogs. It will also give you ideas for styling and purchasing quality t-shirts.
However, you can learn how to soften a t-shirt without damaging the tee from our blog. So go and check it now. I hope this gives you some ideas for styling and purchasing quality t-shirts! If you have any additional queries, please get in touch with me.
What type of fabric is best to shop for such as totes, tees,? While in the manufacturing process, vinyl goes wrong somewhere. However, it is best to know what type of fabric is good and the vinyl is removed easily. When shopping for t-shirts at VeeTrends.Com, the fabric content is an important consideration.
Regular cotton is hard to beat for a comfortable everyday t-shirt that breathes well and feels soft against the skin. Further, regular cotton is made from short fibers, giving it a looser weave and a casual feel. The short fibers also mean cotton absorbs moisture easily, making it ideal for t-shirts you plan to wear during active tasks or warm weather. However, cotton tends to wrinkle and fade faster than synthetic blends.
Ring-spun cotton is a higher-quality option with a more intensive spinning process for a tighter weave and smoother feel. This results in t-shirts that are softer, longer-lasting, and more resistant to pilling. The tighter weave also means ring-spun cotton tends to hold its shape better after washing. However, ringspun cotton t-shirts typically cost more than regular cotton.
Polyester blends, like 65/35 cotton polyester, offer benefits like lower cost, quick drying time, and reduced wrinkling compared to 100% cotton. However, polyester does not absorb moisture like cotton, so these blends may feel warmer and retain odors more easily. Synthetic fibers can also be harsher against the skin.
If vinyl details or decorations are a concern, cotton vs. polyester: cotton will likely be easier to remove and restitch since polyester tends to bond more strongly with vinyl adhesives. Furthermore, check out the blog for both the most common options and how to wash and care for polyester.
If you start with the right T-shirt material for heat transfer vinyl, you have a much better chance of being able to take the vinyl off if you mess up. Shirts made of cotton, polyester, or a mix of cotton and polyester work best because they can take a lot of heat without any damage.
As much as possible, you should avoid making mistakes. Fixing mistakes repeatedly can wear down the fabric and waste your time. Here are some things to keep in mind so you don't mess up:
Avoid heat presses: You may not get the desired results when using a heat press on short sleeve t-shirt. Use a simple flat iron from home instead.
Don't let your shirt shrink: When you put the shirt in the dryer, make sure to set it to the right temperature for the material. If you ignore this detail, your shirt will shrink. You might not be able to use it in the end.
Using petroleum jelly might be the method that takes the most time and effort out of all the ones listed. But using petroleum jelly is a great way to finish up after using the other methods.
Petroleum jelly might not be as good at removing HTV as other chemicals and tools, but it does a great job of removing HTV residue from your custom t-shirt.
If you want to fix a mistake you made when you first set up the HTV, you should use a dryer. The dryer is also an excellent way to get rid of vinyl residue after you've tried other ways to remove it from your Gildan t-shirt.
How do you use this technique? This is the easiest way to do it. Just put the shirt in the washer. Put it in the dryer as soon as the wash cycle completes. Once you take it out of the dryer, you can start to scrape off the HTV.
Like rubbing alcohol, acetone is a chemical solvent, but it is safer to use on hoodies. Nail polish remover is 100% acetone, so you can use that. When removing HTV with acetone, the steps are the same as when using rubbing alcohol.
The most efficient method for removing vinyl depends on the size and complexity of the vinyl. It is crucial to exercise caution during the process to prevent any harm to the underlying surface.